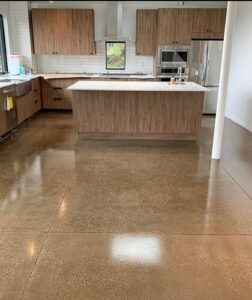
Making decorative concrete is an art form that yields some truly beautiful results. A well-made concrete countertop can come in any color, pattern, or texture, and is made to last a very long time. Making something this great takes some skill and some experience with the finesse of finishing indoor decorative concrete. Let’s look at the steps involved in making concrete countertops.
Step 1- Casting
Concrete starts as a liquid that is poured into a form built to guide its shape. Decorative concrete can actually be very thin, even less than one inch sometimes, so the forms for concrete countertops aren’t very deep. The forms can be built right in your kitchen or the contractor may choose to build the forms and pour the concrete in their workshop, and deliver the finished product to you. The forms can be built in any shape, which is one of the benefits of concrete countertops. Structural reinforcement such as steel or wire mesh may also be built into the casting forms. They can include a textured edge as well.
Step 2- Mixing
Oftentimes, the color pigments will be added to concrete during the mixing stage. this is the stage where powdered concrete is mixed with water and other additives to get the right color and texture before it is poured into the forms. Other additives in concrete used for countertops might include acrylic, fiberglass, and other strengthening agents.
Step 3- Pouring
Once the concrete mixture has reached the desired texture, it’s poured into the form and smoothed overusing special concrete finishing tools. The concrete at this stage will conform to whatever shape the form was made in.
Step 4- Pre-Curing Finishing
Some of the finishing of concrete countertops will take place before the concrete dries. Adding color pigments or embedding glass or stone embellishments is done before curing. Concrete stamping to create a decorative edge, or to create an overall texture that resembles natural stone or tile may also be done at this stage.
Step 5- Curing
Once the surface of the concrete is in the right shape, it is left to dry, or cure. This allows the moisture to rise out of the concrete and is necessary to ensure a good seal later. Curing takes a few days, and the forms are left in place during this time.
Step 5- Additional Finishing
Once the concrete is cured, it’s time to add the finishing touches before sealing. The surface of concrete countertops is ground using a fine diamond sander to produce a smooth surface. If you’re planning to acid stain your countertops, this will be done at this stage as well.
Step 6- Sealing
The last stage of building concrete countertops is to apply a sealer to the surface. The sealer provides a beautiful finish and protects the slab underneath from damage. Sealer can be applied in varying lusters from high-gloss to matte to give you exactly the look you were going for.


